Misty’s Christmas Countdown Day 3! with Lawn Fawn Stamps! PLUS a very special guest :)

Hi guys!

Welcome to day 3 of my Christmas Countdown Series! I hope you have liked the projects so far?

The projects this week are going to be a little bit similar as I wanted to use my embossing folders and dies that I have. They always tend to be things that I buy but hardly ever use!

Today my 4 year old is off from school poorly, so she was with me while I was making the card. I’ve left some snippets of her in the video so I really hope she makes you all smile as much as she does me πŸ™‚

20151006_132412

Click the photos to be taken to the YouTube video!!

I think the bunny is sooo cute!! By the way I call the stamp set snow bunny during the entire video, haha! But its actually the Winter Bunny stamp set.

Supplies I used

  • Winter Bunny stamp set and dies from Lawn Fawn
  • Yeti Set Go stamp set and dies from Lawn Fawn
  • Stitched Hillside Boarder Dies from Lawn Fawn
  • Patterned paper that I think came from last years Christmas Simon Says Stamp card kit
  • Real Red cardstock from Stampin Up
  • Large dots embossing folder from Stampin Up
  • Apothecary Accents dies from Stampin Up
  • Watercolour paper
  • Zig Clean Colour Real Brush Markers (please refer to the video for the exact colours I used)
  • Merry Christmas Die from Simon Says Stamp
  • Glitter paper from Stampin Up
  • Basic Rhinestones from Stampin Up
  • Wink of Stella glitter brush pen. Clear and Red.
  • Uni ball white gel pen
  • Sakura Glaze black gel pen
  • Assorted Moonshine sequins from Simon Says Stamp
  • Tombo liquid glue
  • Multi Medium Matte glue from Ranger

I think that’s it!! Bit of a long list today, so I shall try and do a few with very minimal supplies πŸ™‚

20151006_132446
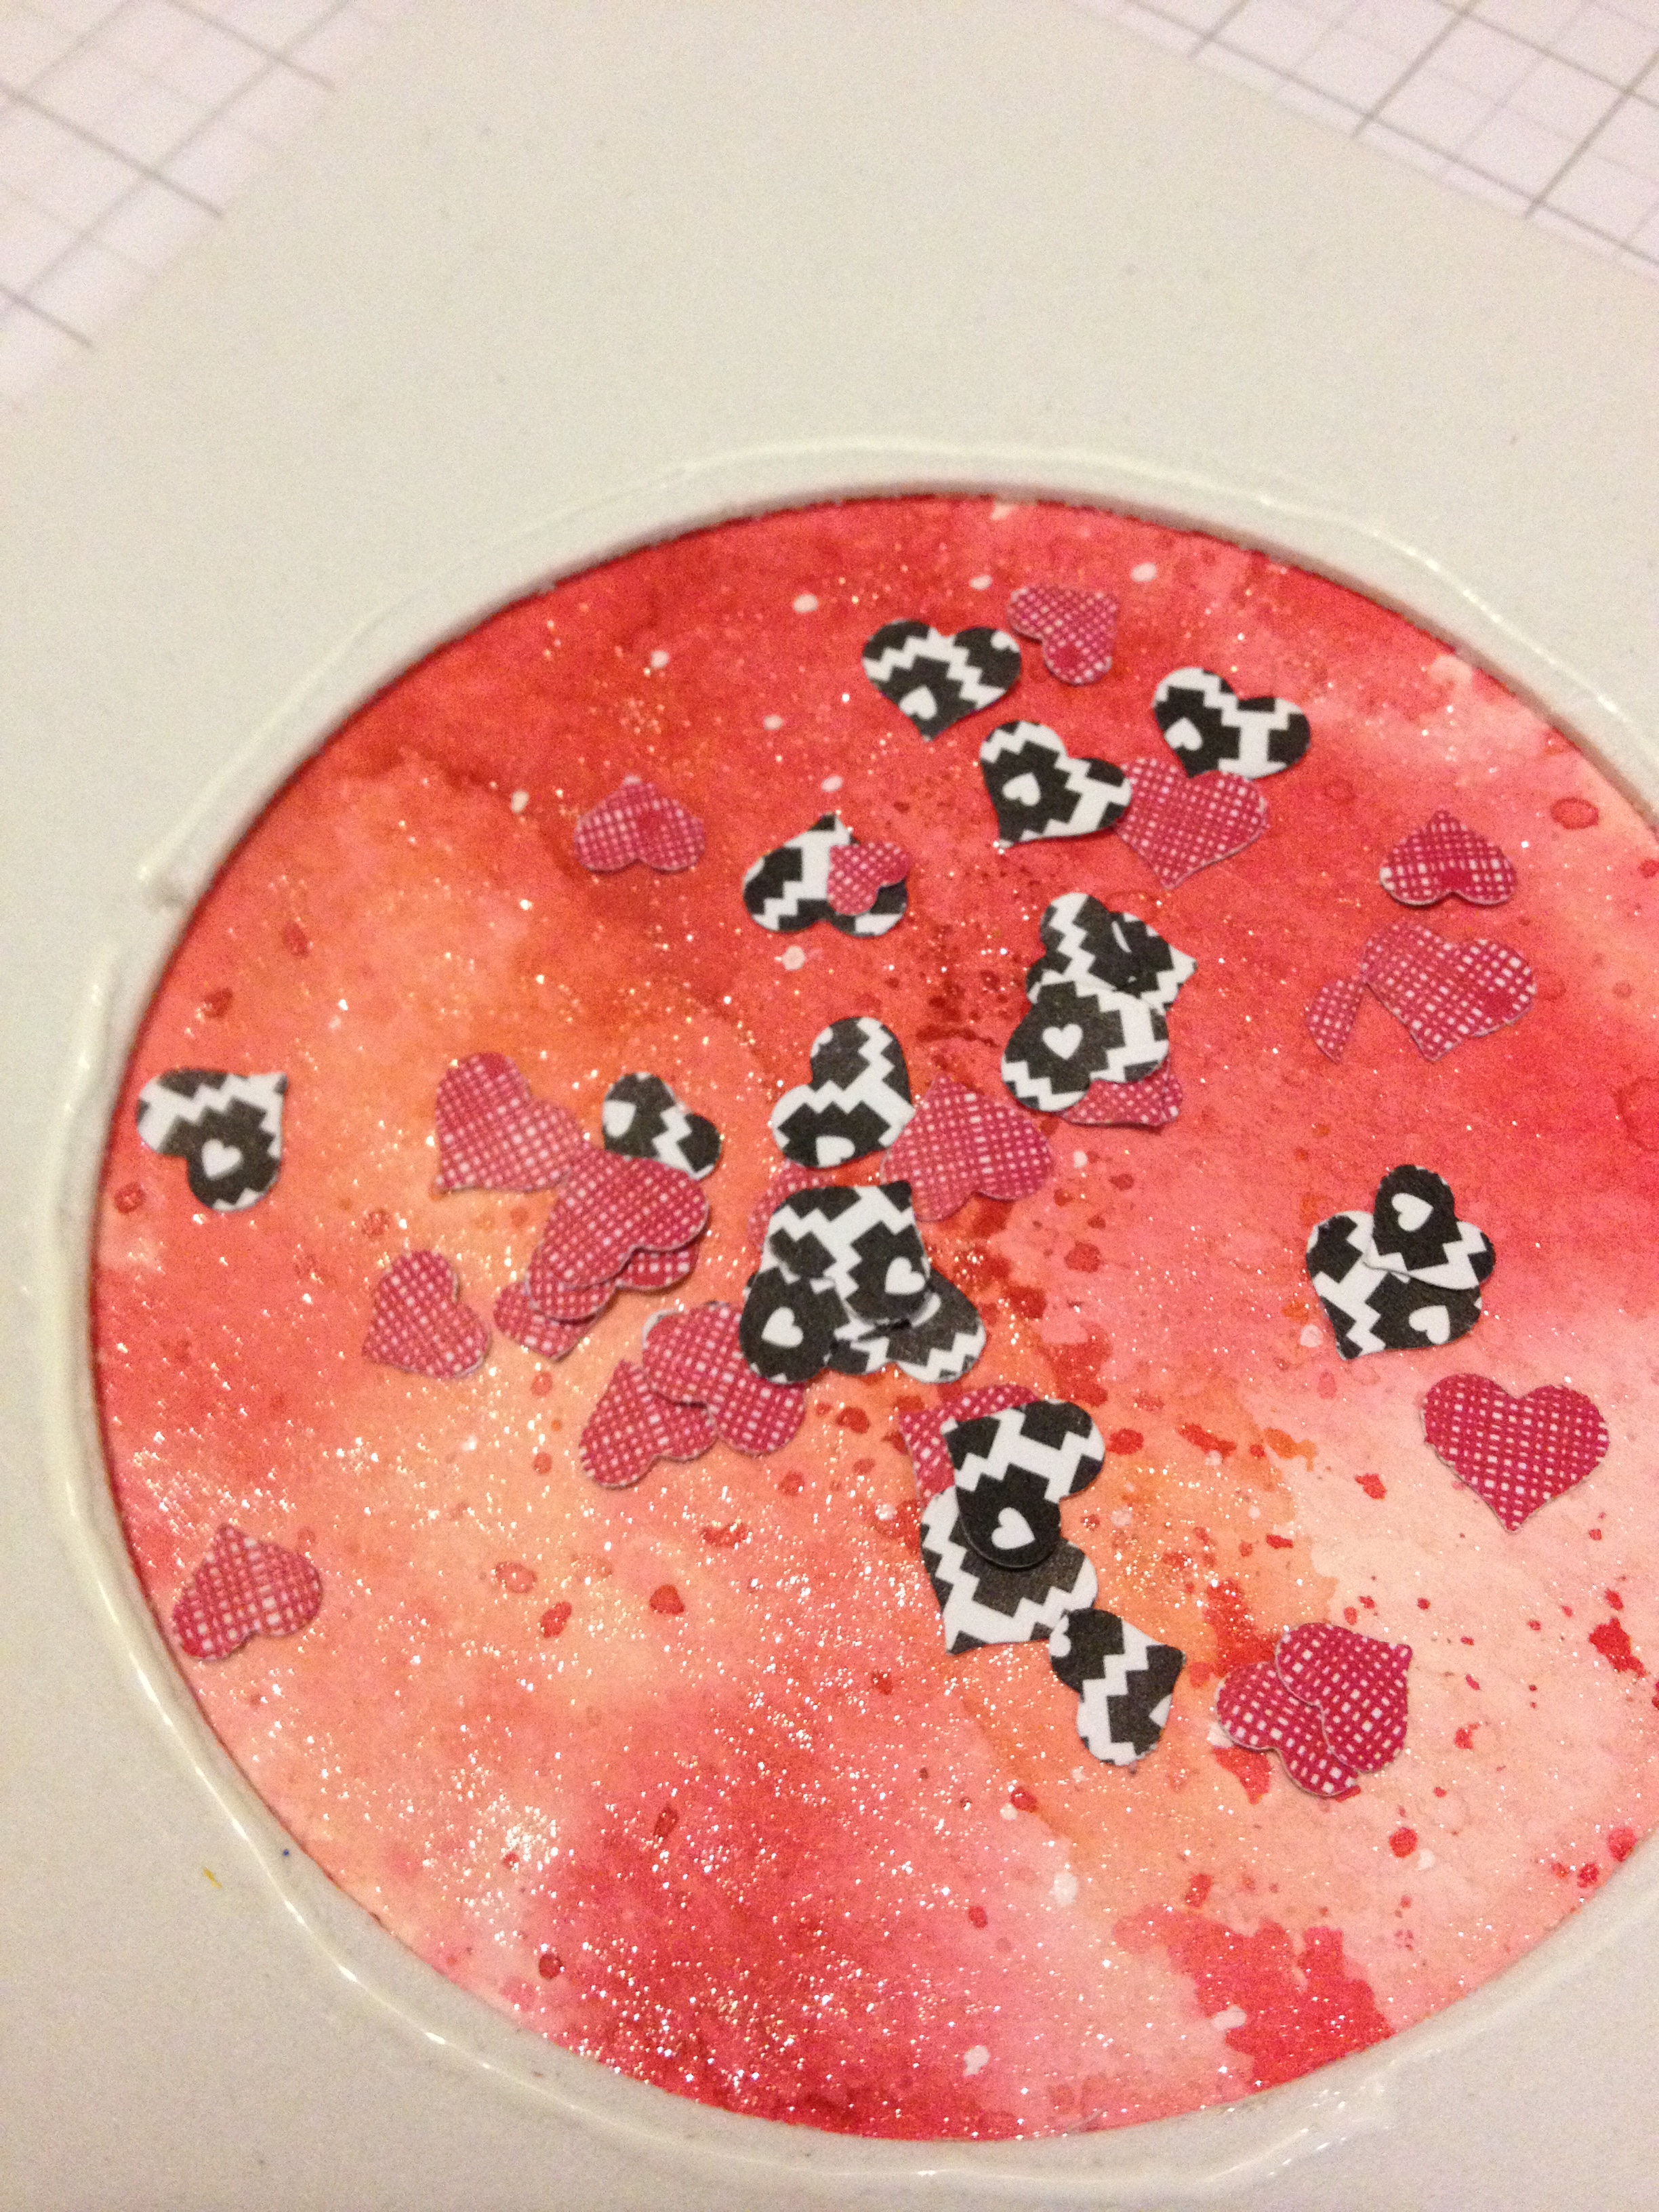
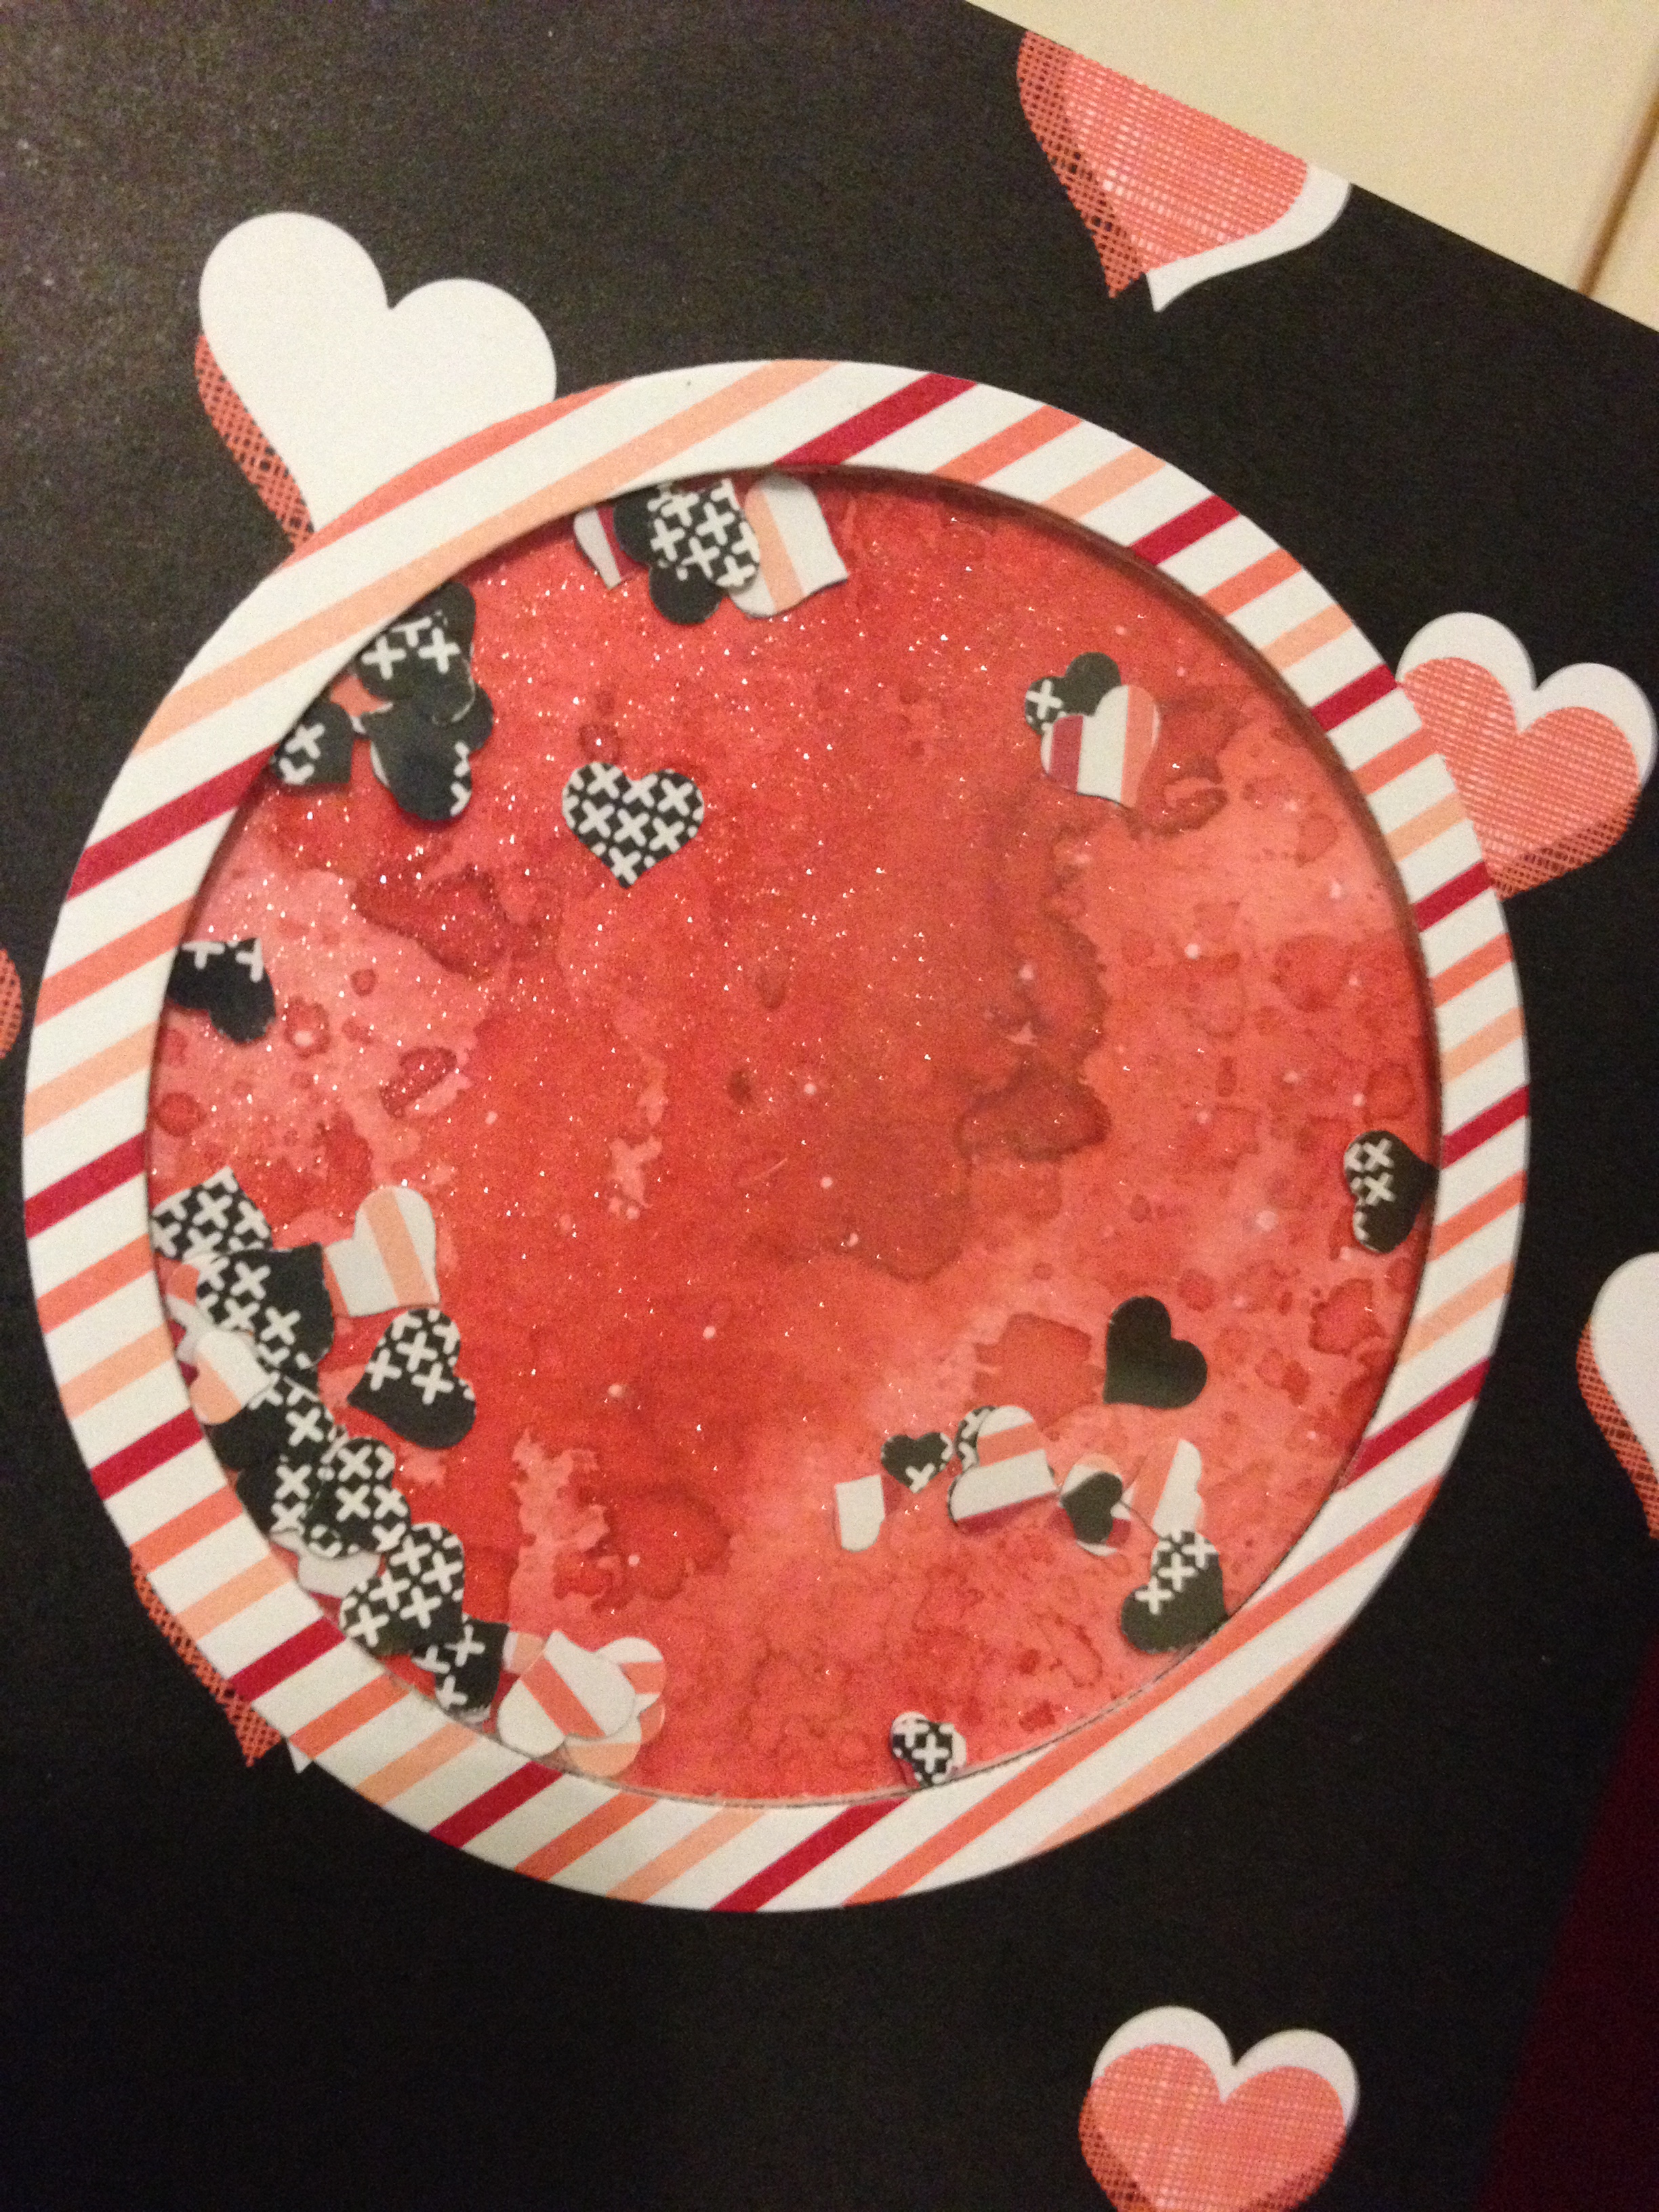
I’ll add a few more so you can see some close ups of the glitters and shimmers πŸ™‚

20151006_132441I really hope you enjoyed this video and blog post today πŸ™‚ Please like, comment and subscribe if you would like to see more from me! And please make sure you head on over to my YouTube channel and subscribe over there to!

See you Thursday for Day 4!!

Ribbon Pull Gift Card Holder w/Stampin Up Supplies!

Hello everyone! Happy Wednesday!

The project I have for you today is really easy to put together but a really cool way to give someone a gift πŸ™‚

IMG_5768

So much sweeter and more thoughtful then just sticking a gift card in an envelope!

First you will want to measure your gift card, they are pretty much all the same size but double-check as I’m not sure if it varies by country. You’ll want to cut it into this sort of shape, making sure you have a little excess at the ends for the label punch.

IMG_5766

Fold it in half and put it into your label punch. Now it will be too wide for the guides on the side so you will need to slide it in over the top of them. Just try to get it into the middle as much as you can. I’ve decorated this with some pattern paper cut so there is 1/4″ of the cardstock showing on each side.

IMG_5767

To get the ribbon in the way you need it, thread it through both holes at the top and push it down with the gift card. Tie the ribbon in a bow at the top and that will give you something to pull. This will work by pulling out the card and pushing it back in again!

IMG_5769

But I’m sure you can tie bows better than me πŸ˜‰

Check out the products I used below!!

Annual Catalogue: Angled tag topper punch 133323, Bermuda bay taffeta ribbon 131206, Lost Lagoon cardstock 133686, Moonlight dsp stack 133701.

I hope you all like this little project and give it a go πŸ™‚ As always don’t hesitate to email me or fill in a contact form if you would like me to post you a catalogue!

See you Friday!


A Look At Sundays Craft Day!

Hey Everyone! Hope you’re all well and have had a much better Monday than I have!

As promised here is my little overview of the Stampin Up demo craft day that I went to yesterday πŸ™‚

So here are the projects that I made:

IMG_5915

These were demo’d by the lovely Caroline at http://www.craftyhallet.co.uk and the lovely Elaine at http://www.papercraftbutton.blogspot.com

How cute is that little chick?! And there was also a mini album but it’s not finished yet, so will share when it’s all done!

And these are all the swaps I received:

IMG_5914

I love all of them! All the ladies put in so much effort and they’re all so beautiful!

Make sure to come back Wednesday for a project!


Lotus Blossom Door Hanger! Project 2 w/Stampin Up!

Hello all! Welcome back to my midweek post and project 2 with the Stampin Up Lotus Blossom FREE stamp set!

This is something that I used to do all the time but hadn’t in ages. When I was sat thinking about these 3 projects I wanted to do this week, I knew I didn’t want to stick with all cards. So here is a door hanger for you!

IMG_5882

I’ve made this one for my Mum for mother’s day. Bit early but its good to be prepared!

So this blog post will be set out a little different as I have taken photos along the way this time, as otherwise there was going to be too much a me rambling on!

IMG_5872

So first off, I bought this hanger in a pack of 10 on eBay. You can get them with or without the heart cutouts at the bottom. I gave it a very quick and thin coat of white paint. I left it thin as I didn’t want it completely white, just enough to have a little bit ofΒ  base for the inking I wanted to do.Β  I’ve stamped the flowers and cut them out.

To make the ‘fence’ I have used my woodgrain stamp on some Vanilla cardstock, and I’ve cut them all out and cut a point on top of each one.

IMG_5874

I’ve then sponged over the fence pieces with Sahara Sand ink and Chocolate Chip ink. I love how these turned out but of course, play around and find the look that you want πŸ™‚

So with everything stamped, cut and dry, it was time to ink the background and assemble! I roughly cut out some cloud shapes and sponged in Pool Party from the middle of the cloud mask out.

IMG_5875

IMG_5876

I adhered everything thing on with Fast Fuse and then cut a strip of cardstock and just wrote ‘Mum’ onto it with the darker of my Rich Razzleberry blendabilities. I’ve added some rhinestone’s on just to finish it off πŸ™‚

IMG_5883

I really hope that you like this project! I love having a change-up from cards as I’m never fully happy with my card designs!

Check out what projects I used, below!!

Annual catalogue: Very Vanilla cardstock 106550, Crumb Cake ink 126975, Chocolate Chip ink 126979, Sahara Sand ink 131179, Rich Razzleberry ink 126950, Real Red ink 126949, Old Olive ink 126953, Mossy Meadow ink 133645, Hardwood stamp 133032, Rhinestone basic jewels pack 119246, Fast Fuse adhesive 129026, Rich Razzleberry Blendabilities 131003.

And of course, the Lotus Blossom stamp from the Sale-A-Bration catalogue, which you can choose (along with lots of other goodies!) for completely free with every Β£45 spent!

As always, contact me if you would like any information on the products that I have used, if you would like me to post you a catalogues or if you would to purchase πŸ™‚

See you on Friday for a third project with this beautiful layering stamp set!


Lotus Blossom Week, Project 1! w/Stampin Up!

Hello everyone! Welcome to my week of Lotus Blossom projects πŸ™‚ Now as I said last week, this is my favorite stamp set from Sale-A-Bration this year, and I’m going to show you 3 different ways to use it.

IMG_5873

Before I start though I just want to remind you all that this is a FREE stamp set!

Today’s Lotus Blossom project is this beautiful square card.

IMG_5884

So the first thing I’ve done here is ct a piece of white cardstock in a square and stamped on my Lotus blossom. Stamping the flower first and then the stem. I’ve then made a mask for the flower with some masking tape and used a circle die to cut a hole for a mask for the inked area. Apply the masks and then sponge in some ink and then I’ve used a wood grain background stamp over the top of that. I’ve then sponged the edge of that first square piece, flicked some ink on and mounted onto another white piece cute to 1/4″ larger on each side. I’ve them mounted the whole piece onto a cardbase, also 1/4″ larger πŸ™‚

Check out the products I’ve used, below!!

Annual Catalogue: Stampin Sponges 101610, Tombo Multipurpose liquid adhesive 110755, Whisper White A4, 106549, Sahara Sand A4 121695, Sahara Sand ink 126976, Crumb Cake ink 126975, Hardwood background stamp 133032, Real Red ink 126949, Rich Razzleberry ink 126950, Cherry Cobbler 126966.

And of course, The Lotus Blossom stamp set that is absolutely free with every Β£45 spent through til the end of march (there are also lots of other freebies to choose from!)

I really hope you like this card πŸ™‚ As always all the links to catalogues are at the top of my home page, or if you would like me to send you one, please use the contact form below to give me your details!

See you Wednesday!!

Bee Happy Card w/ Stampin Up Supplies

Hey all! Last day of the week, Yay!! Kids back to school Monday, Yay!! Well actually that ones not such a yay, I think my eldest could have done with 2 weeks this time. But at least she will get to give out the Valentines that she forgot before half term πŸ˜‰

So this project that I have for you today, was originally intended to be a part of the Valentines week. But like all good plans that one went wrong! It turned out not looking at all like a Valentines card, so I just set it aside to share with you at a different time. Now!

IMG_5850 (2)

(Deceivingly large picture! Please note that the dimensions for this piece are 3″ x 2 1/2″ )

This project started with a piece of watercolour paper which I have blended onto with a light and a darker blue to create a sky background. To add a little more interest onto that I have dropped some water on, this sucks up some of the ink, producing spots of a lighter colour/bleached look. I’ve stamped the Jar and the Bee (also on watercolour paper), coloured them and cut them out. To create the glass jar effect I have embossed the jar with clear powder around 4-5 times. Really you just do that till you get the look that you are happy with. No need to apply VersaMark each time, just add more powder while the previous layer is still wet/hot.

To ground the jar I have cut some green card stock into hill shapes, that way I can pop the jar between them πŸ™‚ To finish I have embossed the sentiment in white and drawn some stitch lines around with my white gel pen.

Now this is just the card front, I haven’t adhered it onto anything yet, so with some clever paper placement you could still have this as a standard sized card, or just use the techniques here to create a bigger card πŸ™‚

Check out the products I have used below!

Annual Catalogue: About the label stamp set (for the jar) 134258, Sweet Stuff stamp set (for the bee and sentiment) 134156, Signo white Gel Pen 105021, VersaMark ink 102283, Aqua Painters 103954, Old Olive cardstock 106576, Old Olive ink 126953, Pacific Point ink 126951, Soft Sky ink 131181, Clear Stampin Emboss Powder 109130.

I hope you all like Fridays project πŸ™‚ As always please like, comment or subscribe. All catalogue links are on my home page, I love the opportunity to be your Stampin Up Demonstrator!

Have a great weekend and I’ll be back on Monday πŸ™‚


Sale-A-Bration with Stampin Up!

Hello all! Little bonus post here for you πŸ™‚

Did you know that until March 31st Stampin Up have a little something going on called Sale-A-Bration??

blogbutton_SAB_demo_1.06.15_UKSP

With Sale-A-Bration you can earn fantastic free products and there is also some amazing joining bonus’!!

Chose a free product from the SAB booklet with every order over Β£45, before p&p!!

This is a great time to join Stampin Up and I would love to have you on my team!!

vidheaders_SAB_demo_join_ENG JoinLP_SAB_demo1_UKJoinLP_SAB_demo2_UK JoinLP_SAB_demo3_UK

If you would like to join my team or have any questions about Sale-A-Bration, then just pop me along an email at craftymisty@hotmail.com or get in touch on my FacebookΒ  http://www.facebook.com/craftbymistyΒ  or use the simple contact form below πŸ™‚

And because I love Sale-A-Bration so much, next week I will be showcasing my favorite stamp set from the booklet, and remember, this is a FREE STAMP SET!!!

Don’t forget to come back tomorrow for my Friday post, and of course Monday for my Lotus Blossom week!!

Embossed Butterfly w/Bleaching Technique w/ Stampin Up Supplies

Hello Everyone! Happy Wednesday πŸ™‚

So we’re half ay through half term already, crazy! And so strange that I haven’t actually done any crafting with the children this week either. They’ve had friends around this afternoon so I’m quickly posting this card while I have a chance!

IMG_5770

Here is my bleached Swallowtail butterfly πŸ™‚ perfect for a less bulky card, easy to go through the post but no less dramatic!

First I have heat embossed the butterfly with silver embossing powder and then painted on with watered down bleach in the areas that I wanted the pale colour. Dry the surface with a paper towel straight after, or leave for a while depending on how much colour you want to take from the cardstock.

I’ve just mounted this one on a cardbase the same colour but I think it suits it perfectly πŸ™‚ And I should mention that I first saw this technique and design on an american demos blog but sorry as it was a few years ago now I can’t remember which one!

Check out the supply list below!!

Annual catalogue: Swallowtail stamp 131943, Basic Grey card stock 121689, Snail adhesive 104332, VersaMark ink 102283, Heat Tool (uk plug) 129054 (eu plug) 129055, Embossing Buddy 103083, Silver Stampin Emboss Powder 10913.

I hope you all liked this card today! As always please do comment and let me know your thoughts πŸ™‚ Also please don,t hesitate to get in contact with me if you have any questions or if you would like to purchase any of the products I’ve used. I’d be more than happy to send you a catalogue. If you’re in the UK or the EU just pop me along an email to craftymisty@hotmail.com

See you all Friday for another make πŸ™‚

Valentines Week Day 5! Classmate gifts w/Stampin Up Supplies!

Hello Everyone, and welcome to day 5 of my Valentines week of projects πŸ™‚

Today’s is a really quick one for you as its Valentines day tomorrow!! (however I am aiming to post again later!)

IMG_5834

I don’t know about you guys but I love a good pun πŸ˜‰

I bought these long bendy pencils from eBay and they were less than Β£10 for 40 of them. My eldest takes 30 for her class and my 4-year-old takes 10 for her nursery friends πŸ™‚

All I have done isΒ  punch out 40 hearts from red cardstock, and used a hole punch in the top right of each heart. Using black ink and a small alphabet stamp set I’ve stamped ‘U R ALL WRITE’ on them all. I stamped in batches of 10, all the U’s then all the R’s etc, and doing them like that took hardly any time πŸ™‚ Just slide the hearts onto the pencils and then you’re done! So easy and quick for if you need to drop something off at school in a hurry.

Check out the supplies below!

Annual catalogue: Sweetheart paper punch 133786, Read Red cardstock 106578, Stazon Black Ink 101406, Simply Serif Mini Alphabet stamp set 126360.

I hope you all enjoyed this project! Feel free to leave me a comment and subscribe πŸ™‚ As always don’t hesitate to get into contact about ordering or anything crafty!!

See you Monday!!

Valentines Week Day 4! Shaker Card w/Stampin Up Products!

Hello everyone and welcome back to Valentines week! This is day 4 and I have made you all a shaker card!! These cards are having a bit of a trend at the moment and with good reason haha, I love them and they look a lot harder than they are, trust me. I’m pretty lazy and if they were too complicated I wouldn’t be making them!

Same as yesterday I have 2 different variations for you πŸ™‚

IMG_5831

I have taken step by step pictures for you this time so the post wont be so wordy πŸ˜‰

I started by making the card background, the technique I used is predominantly used with distress inks (for what I’ve seen anyway) but it worked so beautifully with the Stampin Up ink! I was really happy with how it came out and will do a separate blog post detailing it more thoroughly. I them cut my background down to 6 x 4 1/2″, aswell as a piece of foam (I bought some kids fun foam off eBay) and the card front.

Using my circle framelits and big shot machine, I die cut a circle out of my foam and front, and also created a frame for the front of the card. Using a circle one larger than the one used for the window, I have cute a piece of acetate to seal the shaker window.

IMG_5825

So all your pieces to make the card should now look like this!

Adhere your foam onto your back ground with a strong adhesive. Place what ever you want in the window, I have punched out some heart confetti for mine but you can also use beads or sequins. Just keep in mind how deep your window is, and if you want to put larger things inside, maybe use a thick foam tape or double up on the foam layer.

IMG_5827

Seal the window with the acetate, add the card front and adhere your frame! As you can see I’ve added a little shimmer to mine (couldn’t resist!)

And there you have your very simple but super cute Valentines shaker card!

Check out the supply list below!

Occasions Catalogue: Stacked with love designer series paper stack 137779, Confetti heart border punch 137415.

Annual Catalogue: Real Red cardstock 106578, Real Red ink 126949, Crisp Cantaloupe ink 131176, Blushing Bride ink 131172, Cherry Cobbler ink 126966, Window Sheets 114323, Fast Fuse Adhesive 129026, Tombo Multipurpose Liquid Glue 110755, Uni-ball Signo White Gel Pen 105021, Watercolour Paper 122959, Circles Collection Framelits 130911.

So I hope you all enjoyed this project! Let me know in the comments section below what you thought πŸ™‚ as always don’t hesitate to get in contact with me about products or techniques, I love hearing from you!

See you tomorrow for Day 5 of Valentines week!

IMG_5832 IMG_5833